Are you frustrated by clunky contact form plugins that cost you a lot, limited customization options as premiums are hidden under higher tiers, or confusing setup processes?
You’re not alone. Many WordPress users struggle to create a contact form that truly matches their needs, either because the plugin is too restrictive, requires coding, or hides essential features behind paywalls.
The good news? You can create a custom contact form in WordPress that’s tailored, powerful, and easy to manage—no coding or headaches required. You can even create a custom form in your WordPress site for free using this Form builder. In this guide, we’ll show you exactly how to build the perfect contact form for your site, step by step..
What if a contact form in your WordPress site could do more than just collect customer queries? Wondering how it’s possible?
It is possible by customizing it with some advanced fields. For example, a simple WordPress contact form typically contains general fields- “Name, Email, Message” whereas in a custom contact form, you can add extra relevant fields like advanced file upload, repeater field, signature field, image select field and more advanced fields to make your contact form more engaging.
Well, ready to create a custom contact form for your WordPress site? Today, I’ll be using an advanced but super affordable form builder plugin named Bit Form to create this amazing form, which offers most of the features in the free version.
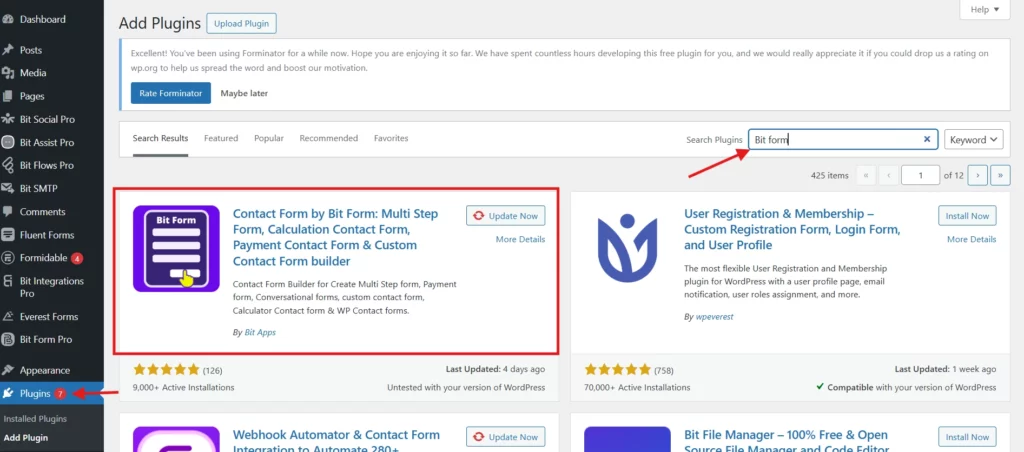
To get started, you’ve to install and activate this form plugin first. Open your WordPress dashboard > Go to Plugins section > Click on the Add New button > Search for “Bit Form” > Click on install and activate the plugin.
Now, you can create a contact form without coding in two ways. One way is that you can simply use the pre-built templates of Bit Form, and another option is that you can also create a form from scratch.
Although it is super easy to build the form from scratch, today I’ll be demonstrating how to use the template.
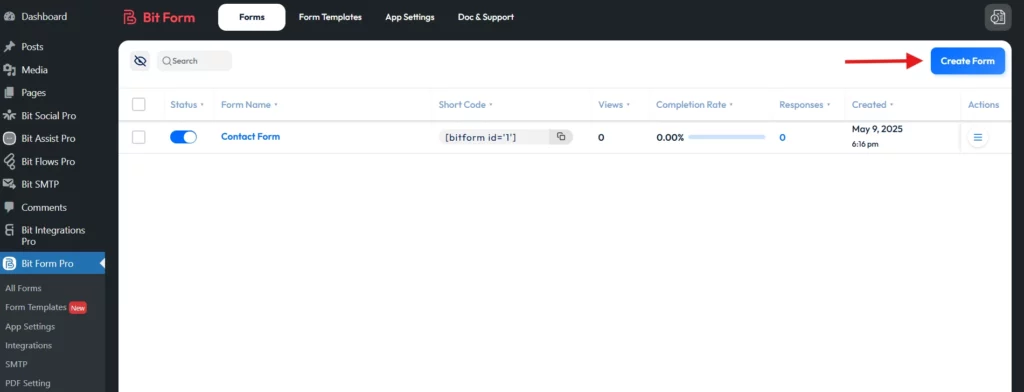
Once you’re done activating Bit Form, open the Bit Form dashboard. There you’ll see a “Create Form” button, simply click on it.
After that, you’ll see more than 30 templates of this drag and drop form builder. These useful, beautifully designed templates include a Newsletter form, a Meeting Room Registration form, a Job Application form, a Customer Complaint form, and many more.
Since today we’ll be creating a customizable contact form, so click on the “Use Template” button under the Contact Form template.

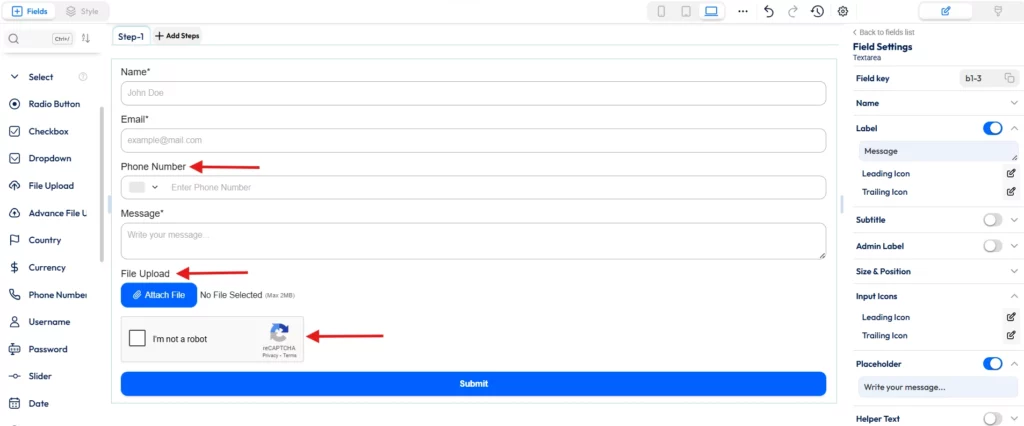
As you can see, the template provides all the basic fields that a simple contact form should contain.

With Bit Form, you can always adjust the fields however you want. Plus, you can customize the form with relevant fields from the left menu to make the form more professional and helpful.
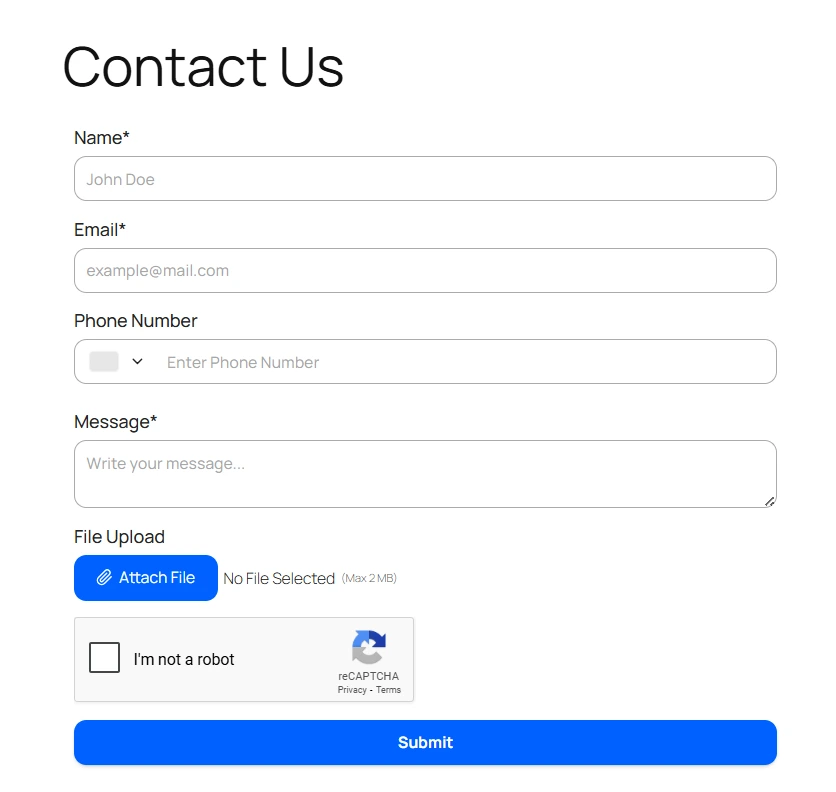
Here, I’ll be adding a phone number field, a file upload field, and a Google reCAPTCHA field.
File Upload field: For example, if your customers are facing a problem with any particular part, they can upload the screenshot here or can upload the confirmation file of their confirmed reservation.
reCAPTCHA: Adding this field to your form will protect your website from malware attacks. Follow this documentation to set up Google reCAPTCHA.
Once your form creation is done, let’s focus on doing some field customization. Literally, you can customize each field with Bit Form. You just need to select the field and do the needed adjustments in the Field Settings option on the right side.
For example, if you select the email field, you can find multiple field settings options on the right.
Let me show you some of them. You can change the label of the field, add a leading and trailing icon to make the form visually appealing. You can also set a suitable Placeholder.
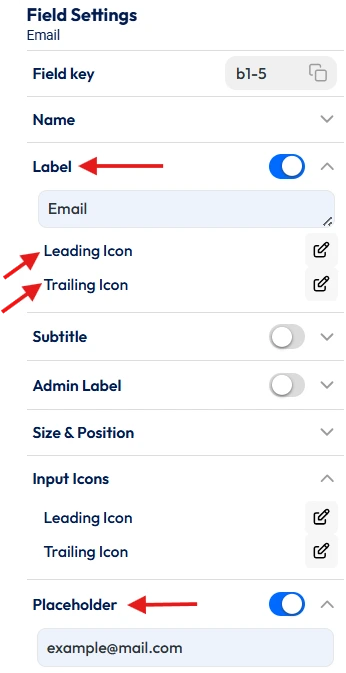
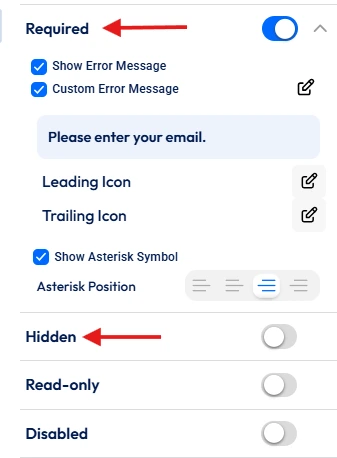
Additionally, you can make any field required or can even hide any specific field.
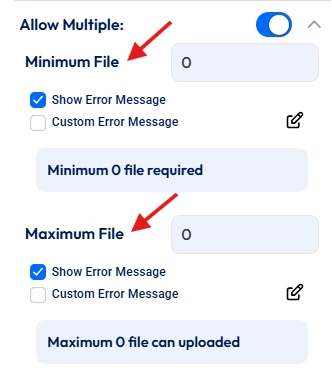
Now, when the File Upload field is selected, you can configure its settings. For example, you can fix the number of files a user can share. And can set the size of the file.
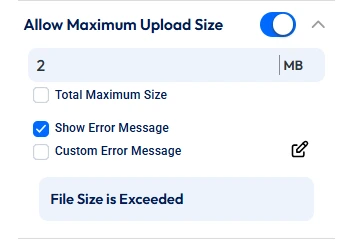
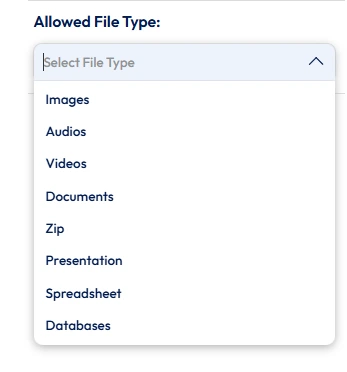
Bit Form also provides options to specify the file type (Zip, Images, Audio, etc)
After completing the form field configuration, don’t forget to save the changes by clicking on the Update button on the top right. And ta-da! Your form is ready for publishing.
Now, it’s time to add the custom form to your WordPress website.
So you can add this form to any existing page or post, or you can even create a new one.
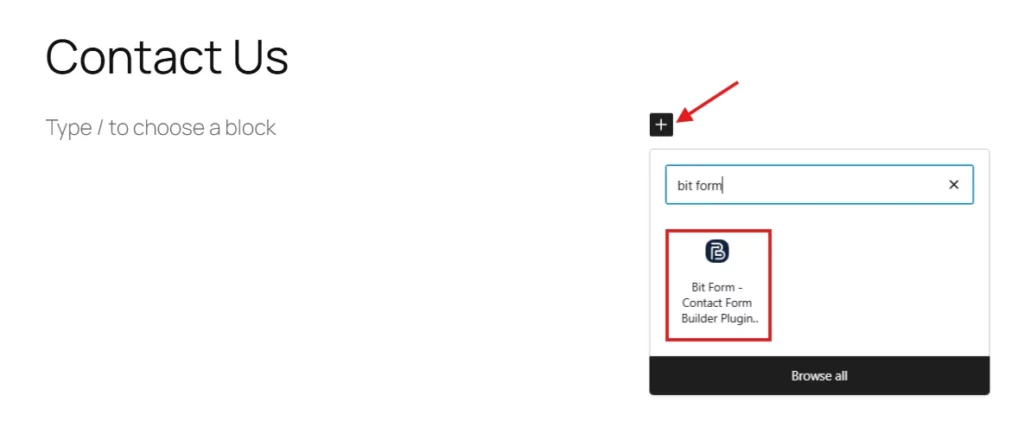
To create a new page, click on the “Add New” button. This will take you to the Gutenberg Editor, give your page a name, and next press the “+” icon.
Here, search for Bit Form block. Then select the form from the dropdown menu. Lastly, click on the “Publish” button and you’re done.

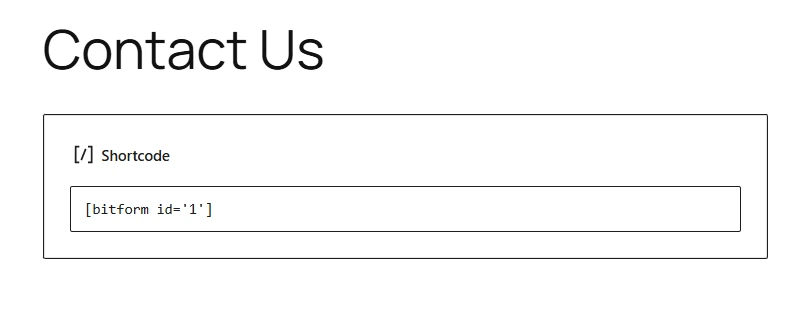
Similarly, you can embed the form on your site using the ShortCode Block. First, you need to copy the shortcode of the form you created.

Then paste the code in the ShortCode Block and hit the “Publish” button.
Look! Your Custom Contact form is live on your website.
This step is completely optional. Now ou can custom-style your customizable WordPress form with custom colors, font styles, and sizes to make the form more attractive.

If you want to create a custom contact form in WordPress, having the right plugin is crucial. It not only speeds up the process but also gives you the flexibility to design forms that fit your exact needs.
And for that, we highly recommend Bit Form. It comes with an amazing drag-and-drop builder that allows even newbies to operate it efficiently. Moreover, a custom contact form does more than collect messages—it gives users a seamless, helpful experience and sets the tone for your brand’s professionalism. By adding advanced fields and tailoring the form to your specific needs, you make it easier for potential clients or customers to communicate effectively.
With Bit Form, this process becomes easy, code-free, and surprisingly fun.