Bit Form V3 Released Now

Offer ends in:
00
days day
00
hours hour
00
Mins Min
00
Secs Sec
days day
hours hour
Mins Min
Secs Sec
Tired of missing form submissions? Learn how to easily set up contact form with email notifications on WordPress to stay on top of every message. Never lose track of a lead or inquiry again!
Don’t worry! Bit Form is here to the rescue. With Bit Form, you can easily set up a contact form with email notifications. It’s as easy as sending a WhatsApp message. Without any coding skills. Cool, right?
By the end of this guide, you’ll know exactly the necessity of a contact form, why instant email notifications are a must, and how you can set up your WordPress contact form in just a few simple steps. Let’s begin.
Having a contact form on your website is like having an OPEN sign on your storefront. It convinces your customers that their problems are being listened to and will be solved. A contact form is the easiest way for your visitors to connect with you, also it makes your website look more professional and trustworthy.
Other than that, having a contact form has many other benefits, like:
But what’s the point of adding a contact form to your website when you don’t receive the notification immediately? What if you lose potential leads?
Good question! Imagine this scenario: someone submitted a form stating some serious issues that require an instant solution. But since so many forms are coming in, somehow this submission got missed. And you lose a solid customer.
That’s why getting instant email notification on each form submission is crucial. When you get notifications for every submission, you can quickly reply to your customers. They don’t have to wait longer for a reply. This way, you’ll gain trust and do more business.
Additionally, email notifications help to understand customer behavior. You can identify what services or products users like the most and where they face problems.
I hope it is now clear why receiving an instant email on each form submission is crucial, you’ll never miss any important messages or lose any leads. In this blog, I’ll be showing you how to set up a WordPress contact form with email notifications. Let’s get started.
The very first thing you have to do is install a WordPress form builder plugin. Among numerous options available, today I’ll be using Bit Form because it is one of the finest, easy-to-use, and affordable form plugins in the history of WordPress.
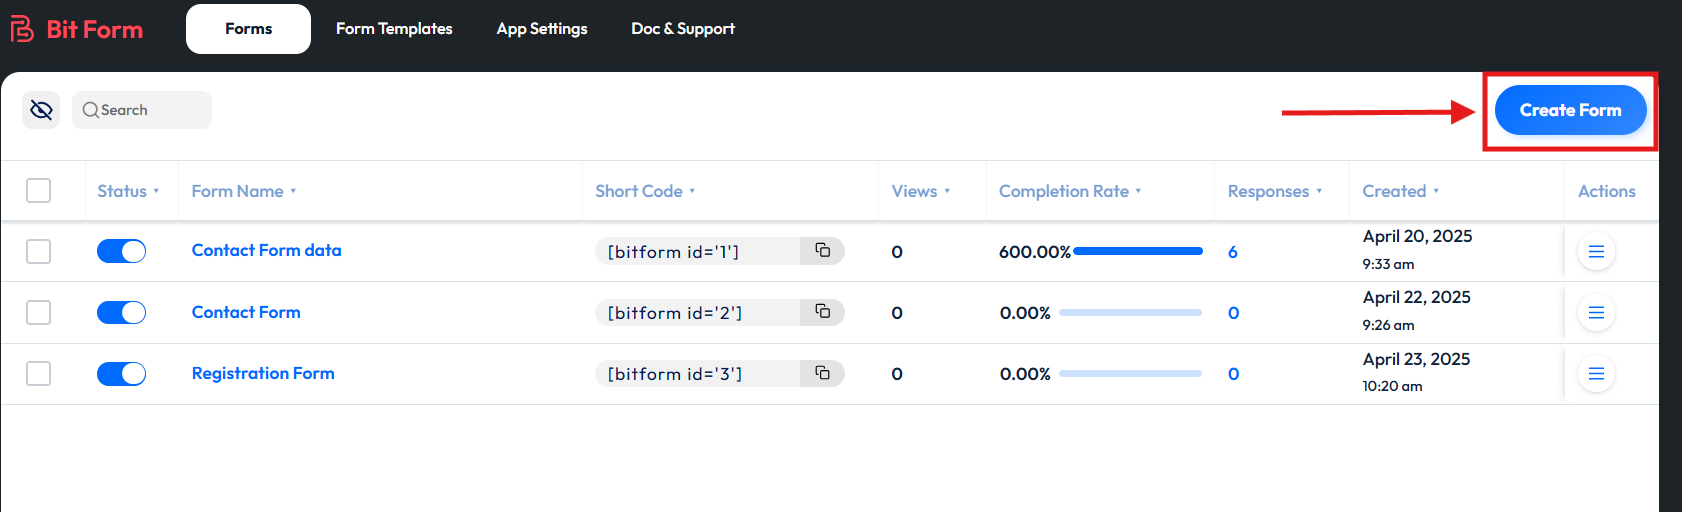
After activation, create your contact form tailored to your business by clicking on “Create Form” button, or you can even use any of the pre-built templates. Since Bit Form is a drag-and-drop builder, you can simply drag and drop fields and customize your WordPress form as you wish.
Now that you’ve created a form, next move to the settings section of the form and click on “Conditional Logic” from the left side.
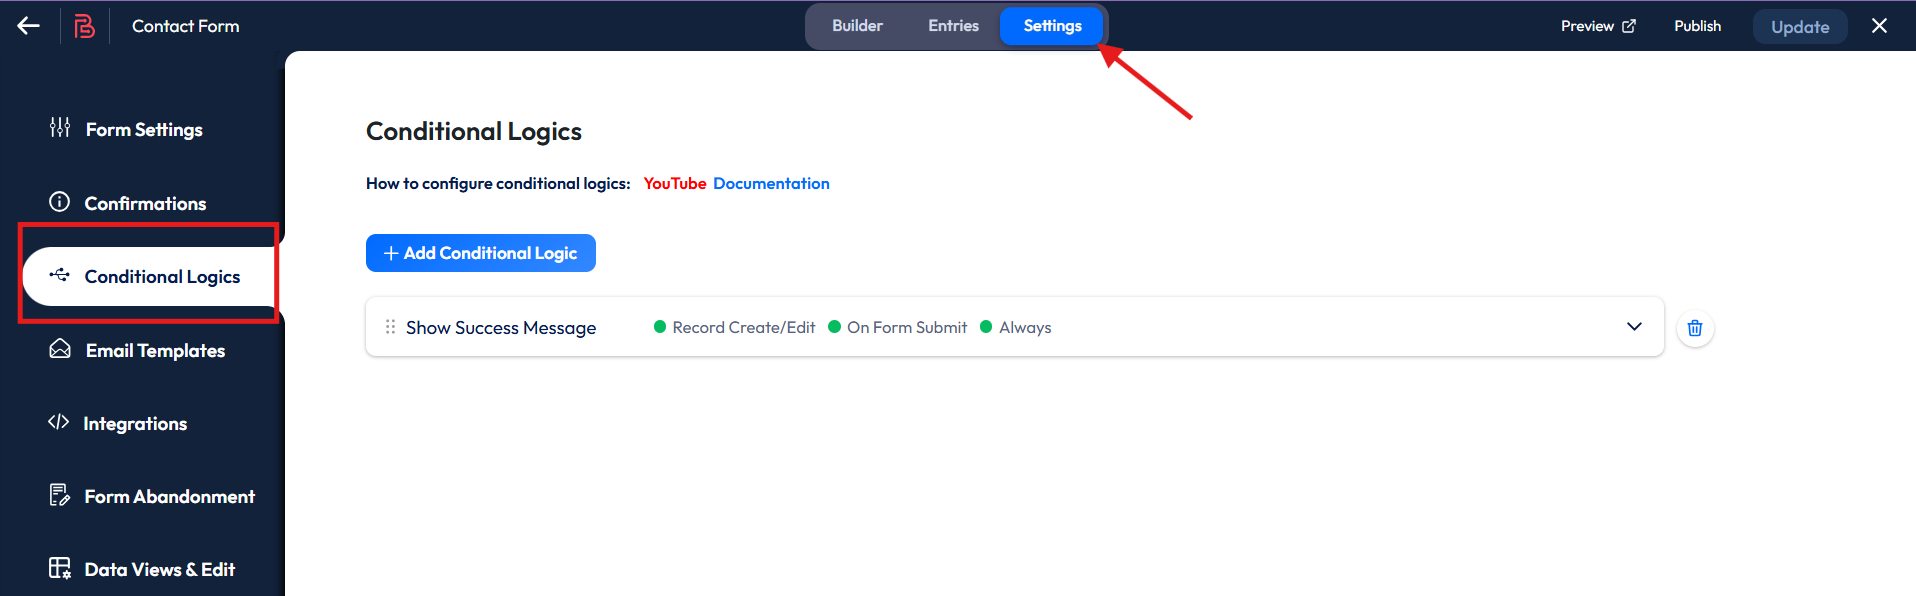
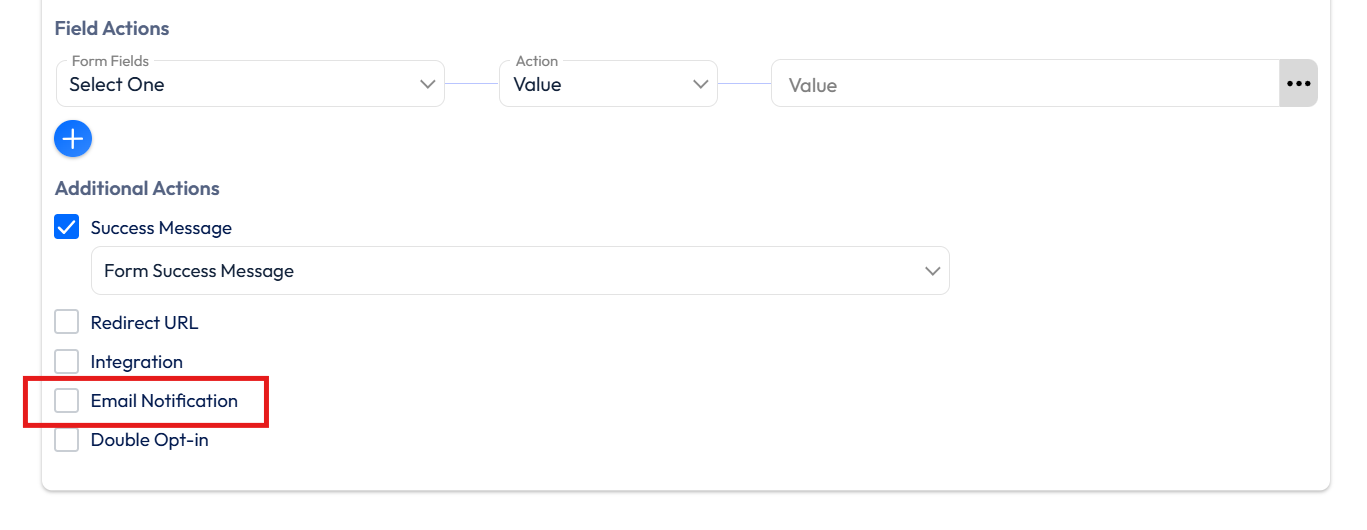
Now you’ve set to conditions to send email notifications. Click on “Show Success Message” > Scroll down under Additional Actions, you’ll find “Email Notifications”, select it> Now choose an email template.
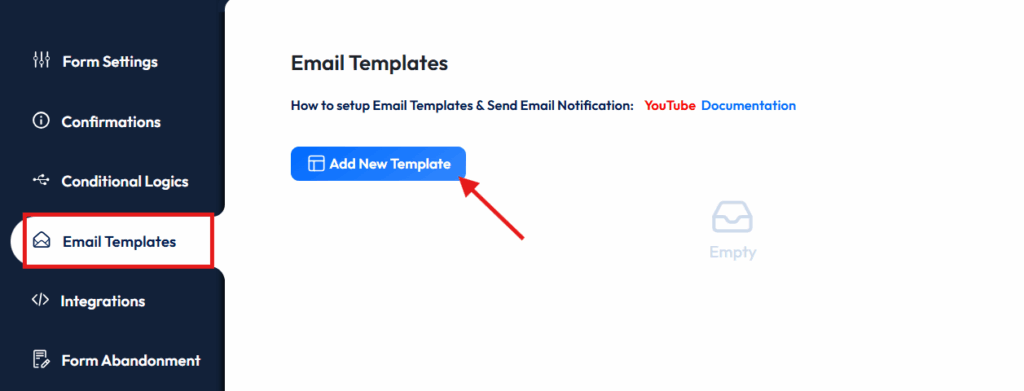
If you don’t have a ready-made email template, no problem, create one! It’s super easy.
Go to the Email Templates section and click on “Add New Template.”
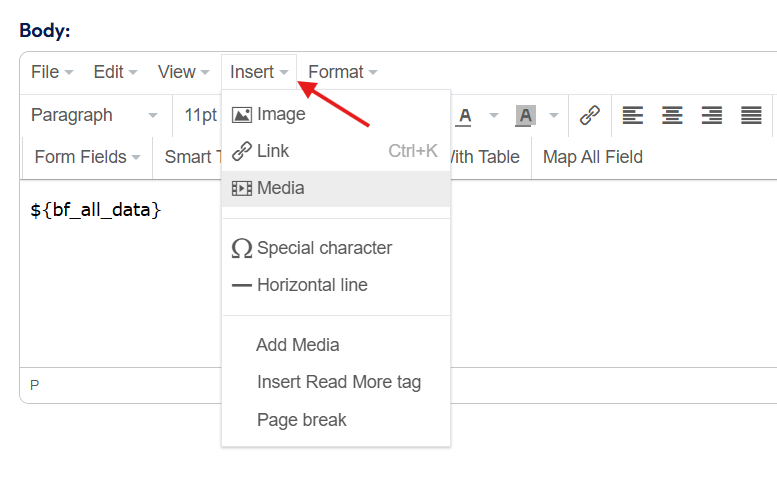
Here, you can give a name to your template, give an email subject, and design the template with form fields, useful smart tags, and can also add any type of media inside the email.

After finishing customizing the template, don’t forget to tap on the “Save Template” button on the top right.
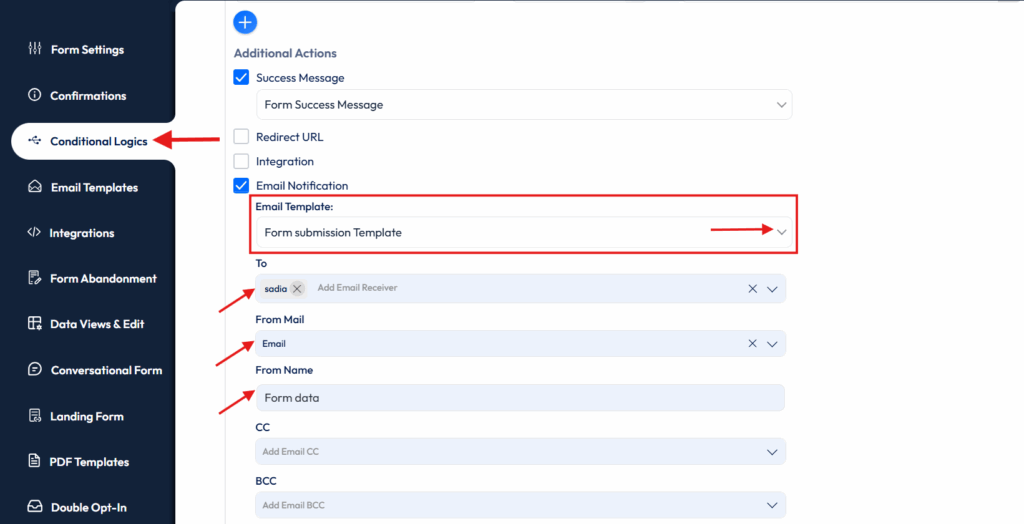
Once you’re done creating the email template, go back to the Conditional Logic section. Now select the template from the dropdown menu > Give To (email address of the receiver) and from (email address of the sender). Then give the name from whom the email is sent.
If you want, you can also add CC/BCC recipients, reply to, send an attachment, and a PDF attachment inside the mail. This will make your form more professional and realistic.
Lastly, click on the “Update” button. Your form is ready.
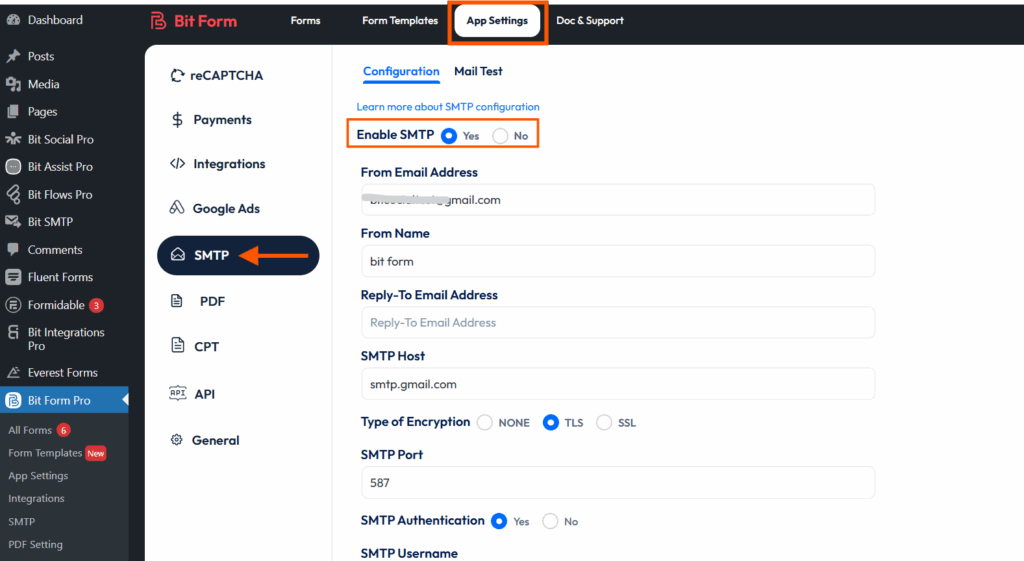
To ensure the email is sent, you have to configure SMTP properly in the App settings section.
Once you move to the App settings section > go to SMTP > enable SMTP > Set up SMTP settings. You can also follow our detailed documentation on SMTP setup.
![]() Note
Note
However, if you’re short on time, you can watch our video on how to configure the SMTP of Bit Form.
After setting up, tap on “Save Changes” button. You can also check whether emails are actually being sent or not in the Mail Test section.
Once you’re done setting up the WordPress contact form, the next step is to embed the contact form in your website. You can add the form to a post, page, or anywhere you want.
Here, I’ll be adding it to a new page.
You can add it to an existing page or create a new one, it completely depends on your needs.
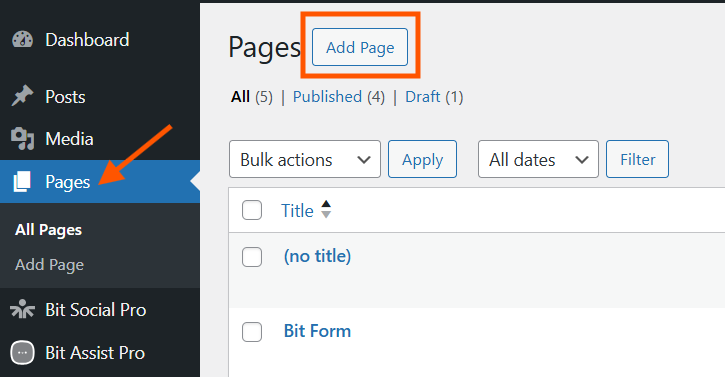
So first, move to the Pages section > click on the Add New button > give it a name.
![]() Note
Note
FYI: You can embed the form in two ways, by using Bit Form’s block or using the Shortcode
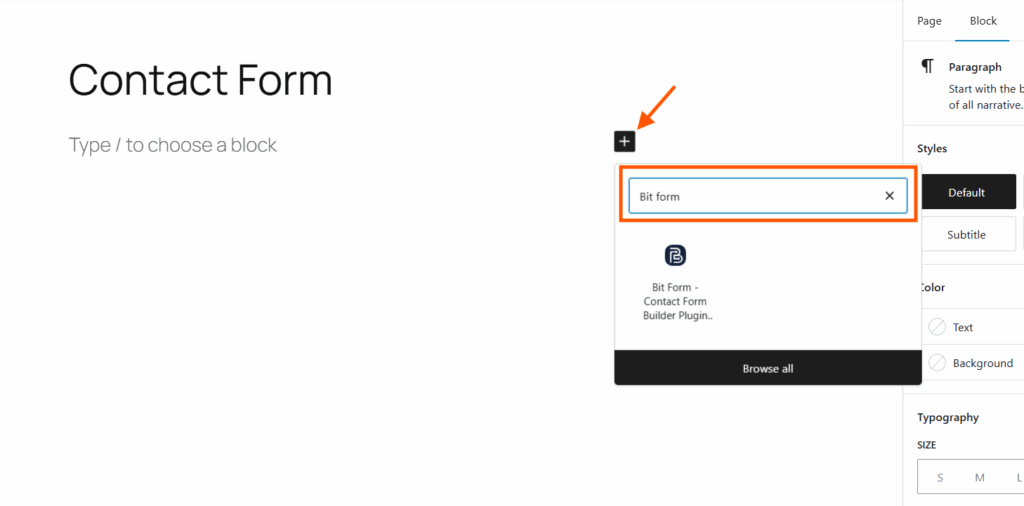
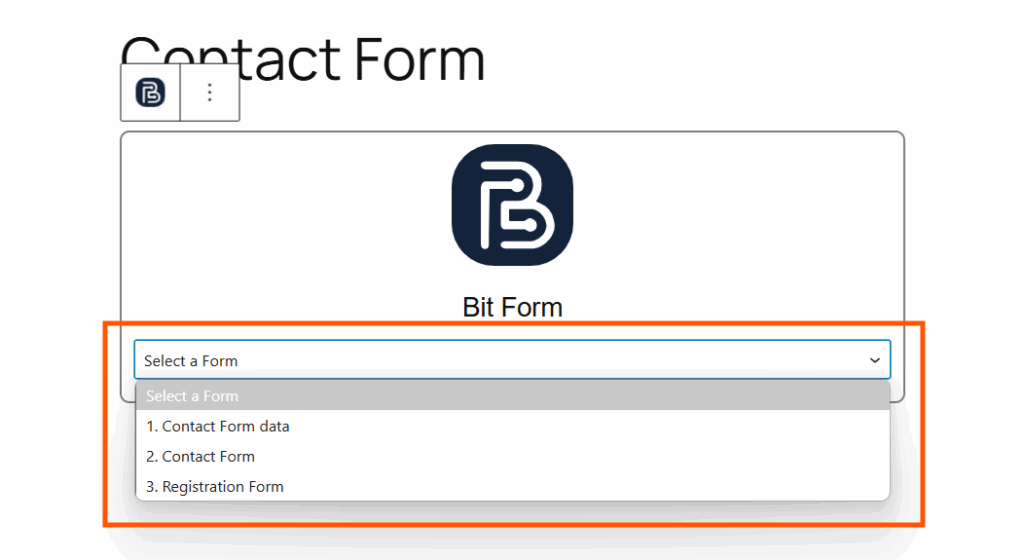
Now, press on “+” button and search for Bit Form > A Bit Form block will appear over the page, and there you’ll see a dropdown menu from where you can select the form you want to add.
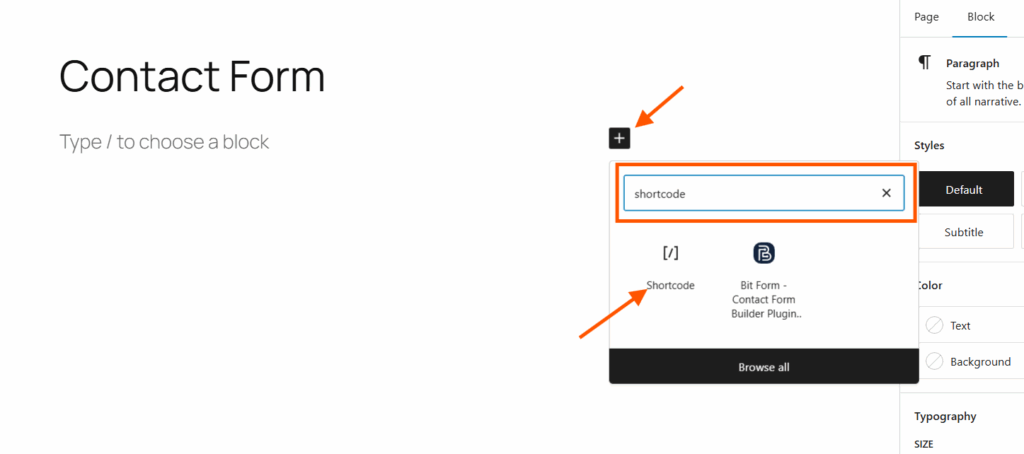
There is another Shortcode option to add the WordPress form. For that, simply copy the shortcode of the form you want to use.

Again, click on the “+” button > Search for Shortcode > Paste the code here and then publish the page.
And here you go, your form is successfully added.
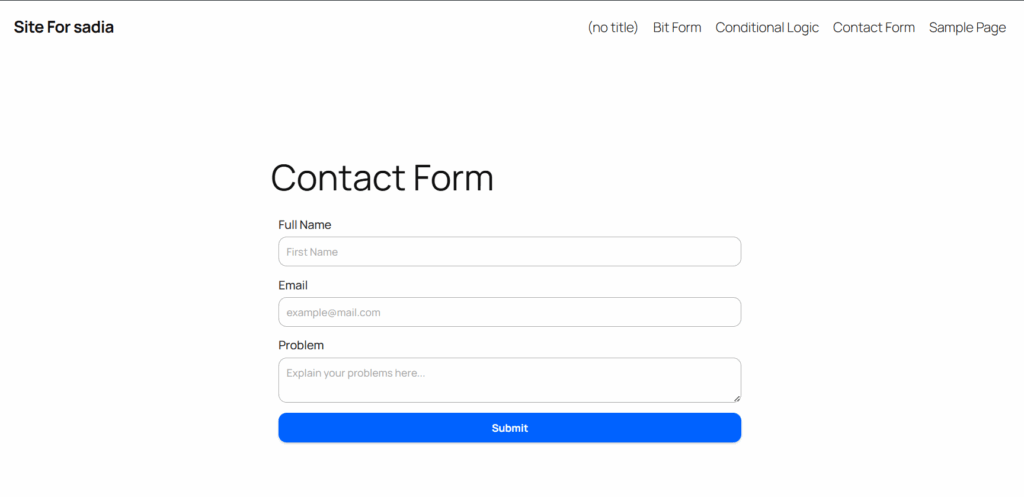
Now it’s time to test the form, submit a test entry to check whether emails are delivered or not. Next, check your inbox.
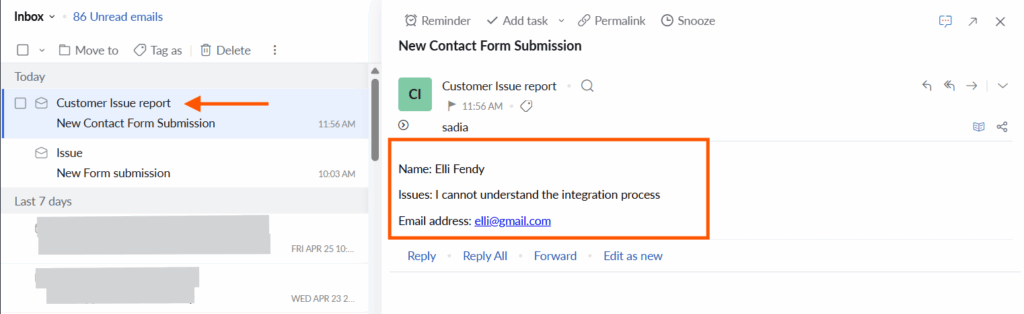
Congratulations, your form data was successfully sent to the intended mail address.
What is the purpose of the contact page on a website?
What is the purpose of email notifications on form submission?
I hope this guide answered all your questions.
Setting up a contact form with instant email notifications on your WordPress website isn’t just for looks. It is for better communication, a stronger bond, faster responses, and enriched brand value.
With Bit Form’s easy-to-use drag-and-drop builder, you can create a contact form and configure email notifications in minutes, make sure all your customer queries are answered quickly, and you never miss a potential customer again.