
Create a Conversational Form in WordPress (4 Easy Steps)
Have you ever wished that your forms could talk back? Honestly, in this modern world, static forms just don’t fit anymore. They are like digital dead ends.
Most of the time, users leave the forms halfway, or sometimes even worse, ignore them completely and thus you lose the potential leads. That’s your hint to think out of the box. Are you familiar with conversational forms? Right now, they’re one of the interactive ways to collect leads and connect with customers.
In this guide, you’ll learn how to create a conversational form in WordPress that talks to your visitors, builds trust, and boosts conversions—all without writing a single line of code.
But before that, let’s learn how conversation forms are better than traditional forms and why your WordPress site should have one.
Table of Contents
What are Conversational Forms?

Conversational form is a type of form that showcases one question at a time, unlike traditional forms that clutter the form with several questions. They actually follow the pattern of face-to-face communication, so that users don’t get robotic responses. These forms visibly boost customer engagement and help to get more leads.
Did you know conversational forms have a completion rate of more than 60%, significantly higher than traditional forms? That’s what studies show: users are more likely to prefer friendly chatbots like conversational forms rather than using tedious traditional forms.
Besides, you can convert any kind of form to conversational forms, such as booking forms, simple contact forms, job application forms, lead generation forms, consumer complaint forms, event registration forms, and so on.
Why Use Conversational Forms in a WordPress Site? (6 Solid Reasons)
Conversational forms make the form more human and natural. They will give you a feeling like two people are talking while filling up the form. They make form-filling fun and give users a friendly experience.
However, in my opinion, conversation forms are more engaging and a great way of gathering leads. Other than that, there are many more benefits of conversational forms.
- More friendly approach than traditional forms
Although both form types are designed to serve the same purpose, that is, collecting user information. However, their approaches are different.
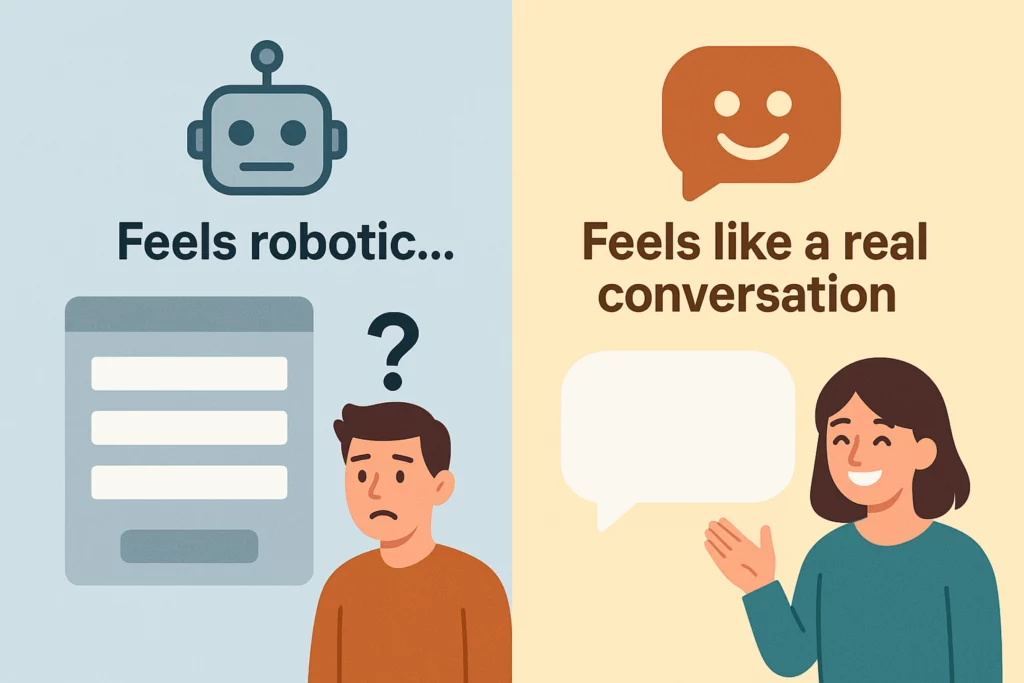
Traditional forms seem cold and boring; they are like interrogating users like a robot. Whereas, conversation forms interact with users just like another human, and maintain a real conversation.
That’s why users sometimes hesitate to share personal information on usual forms because they’re unsure how their data will be used. But with interactive forms, users feel comfortable, which builds trust and encourages them to complete the form.
- Enhanced engagement
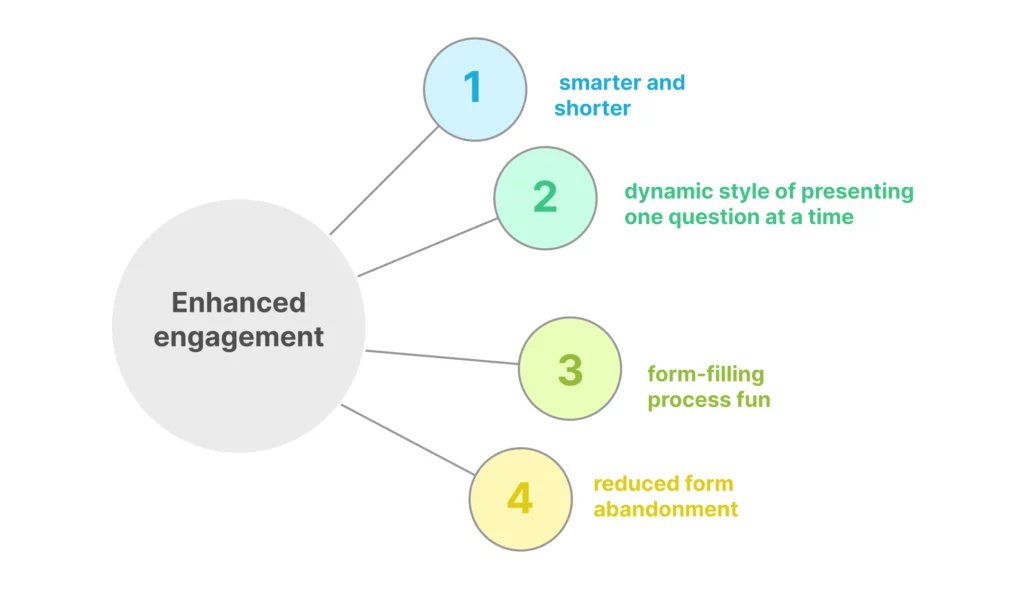
Conversational form is the smarter and shorter version of the long traditional form. They had a dynamic style of presenting one question at a time, which made the form-filling process fun and reduced form abandonment.
- Improved User Interaction

One of the biggest advantages of conversation form is how it guides users throughout the process. Unlike traditional forms, chatbot style form in WordPress don’t contain long form fields; instead, they display useful prompts and guide users at each step. Which is why customers love this personalized experience and trust the whole process.
- Increased Form Completion Rate

Since conversation forms copy chat-style, kind of AI-style form experience so it removes the stress of and the stereotypical myth of FILLING OUT A FORM. Eventually, it will motivate users to finish the form faster. The result? Higher conversions for your business.
Plus, it is seen that 70% of customers using conversation forms are more likely to convert, while the percentage is lower with static forms, 30%.
- Mobile-Friendly

Conversational forms are mobile-friendly. As it follows a real conversation format, users can easily operate the form on smaller displays.
- Boosts Lead Generation and Conversions

Capturing potential leads is easier with conversation forms, as you can turn your booking forms, lead generation forms, application forms, or survey response forms into conversation forms. Also, they are less annoying and don’t overwhelm users with too long forms.
![]() Note
Note
Try these top 5 lead generation strategies on your wordpress site to get more leads
Let’s Create a Conversational Form in WordPress With 4 Easy Steps
Step 1: Install a WordPress Form Plugin
To get started, you first need to install and activate a suitable form plugin. In recent times, Bit Form has been the best-performing, lightweight WordPress form builder. You can simply follow this step-by-step guide to install and activate Bit Form in WordPress.
Step 2: Create a Conversational Project Inquiry Form
First, you need to decide what type of form you want to make conversational, and then decide what questions you’ll add to the form.
Today, I’ll be creating a project inquiry form, which I’ll later convert into a conversation form. And in the form, I’m planning to add the following necessary queries:
- Customer’s name
- Customer’s contact details
- What type of service do they want?
- A brief about the project
- Customer’s budget
- What is the timeline?
So, let’s begin…
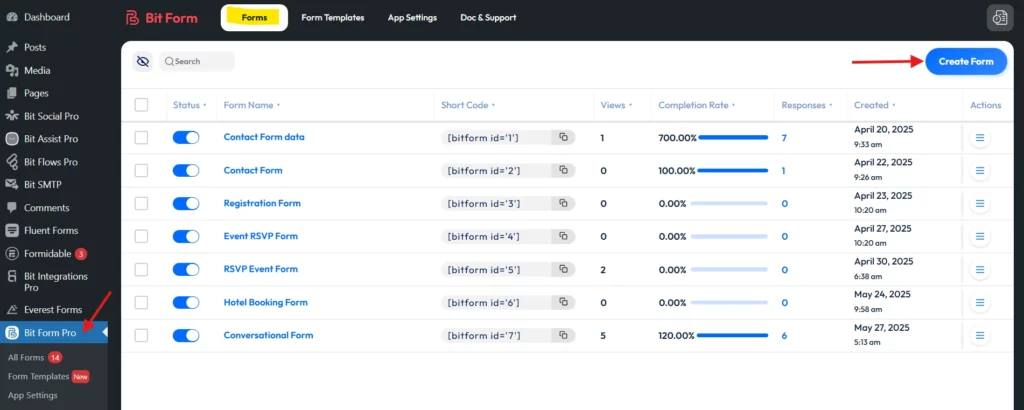
Now open Bit Form’s dashboard > click the “Create Form” button > select the blank form > start designing the form from scratch by dragging and dropping important fields.
First, we need name and email input fields to collect customer’s contact information. Simply drag and drop the fields from the Fields section on the right-hand side.
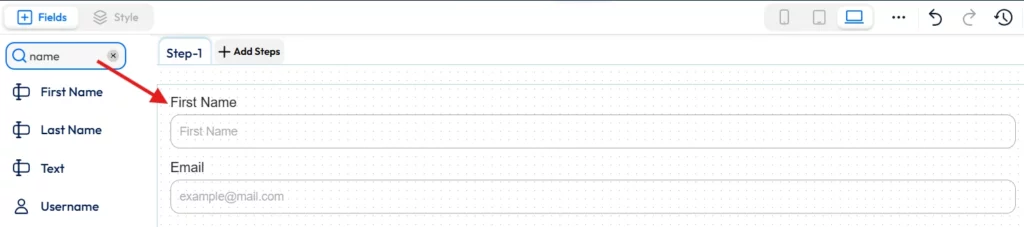
You can always change the label and placeholder of each field. Plus, you can add trailing or leading icons to make the form look nice.

Now, it’s time to add some advanced fields. Since this is a project inquiry form, we need to ask clients a few questions, as shown in the images below.
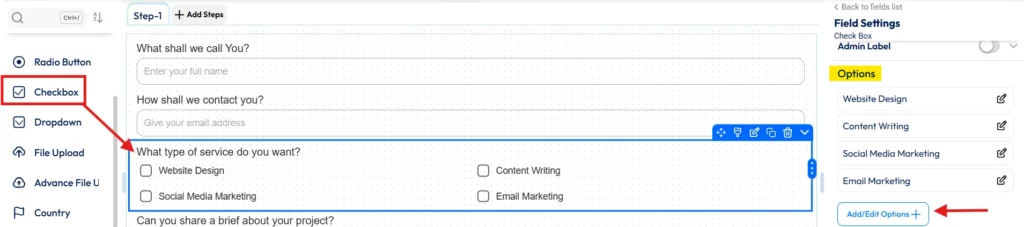
Question 1: “What type of services do you want?”,
Use a Checkbox for this question so that users can select multiple services. To edit service options or to add more, you simply need to click “+Add/Edit Options” button in the Field Settings panel.
![]() Note
Note
F.Y.I: Bit Form comes with 40+ form fields, thus you can build any form, starting from a simple contact form to multi step form.
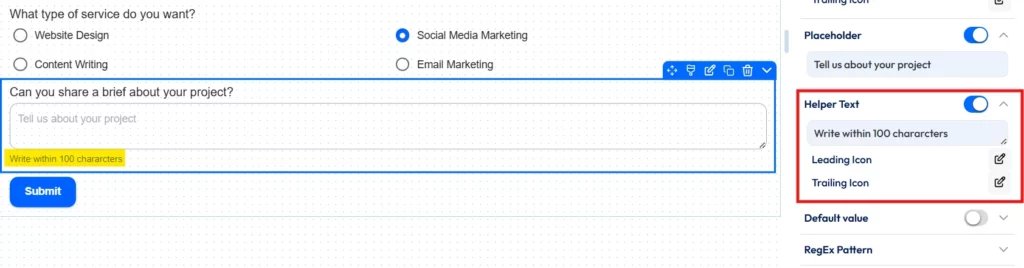
Question 2: “Can you share a brief about your project?”
Add a multi-line text field. Additionally, for users’ better understanding, you can include a helper text like I’ve used in the image.
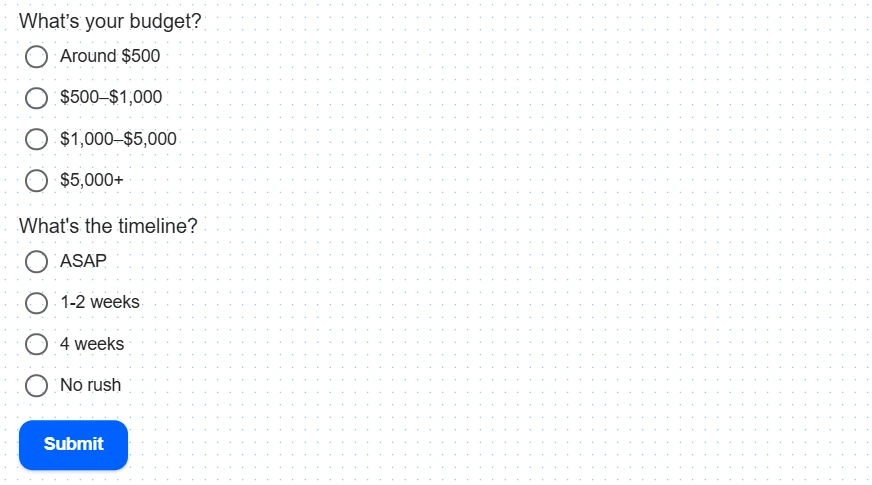
Question 3: “What’s your budget?”
For this question, use a Radio Button. And help users by setting some budget ranges to choose from.
Question 4: What’s the timeline?”
Good Job! Your form creation is complete. Next, you need to configure the conversational form settings to make the form conversational.
Let’s get started…
Step 3: Configure Conversational Form Settings
Now that you’ve successfully built your project inquiry form, next, go to the form settings section. Find “Conversational Form” and enable the “Conversational Form Settings” on top.
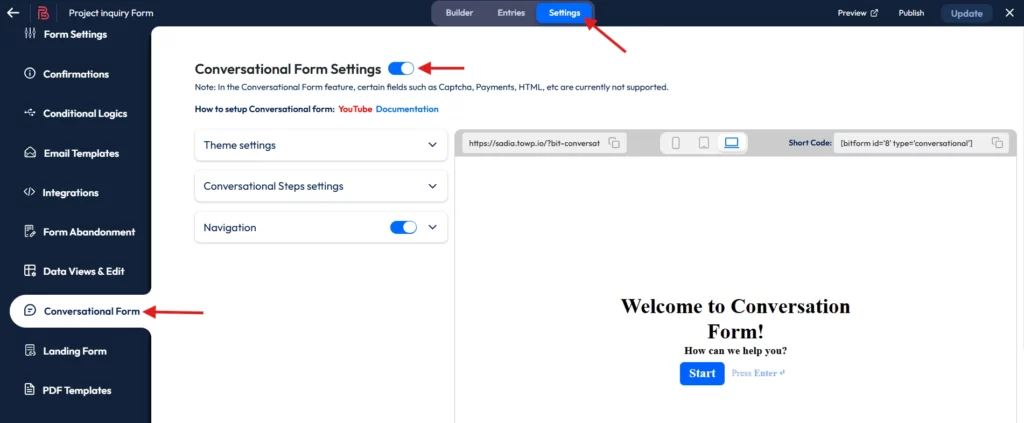
This section consists of three parts: Theme Settings, Conversational Step settings, and Navigation. We’ll configure each part sequentially.
First, let’s set up Theme Settings
With Bit Form’s extensive customization feature, you can adjust the Accent color, Page Background, Label text color, and Input text color, tailored to your business style. It’s as easy as pie.
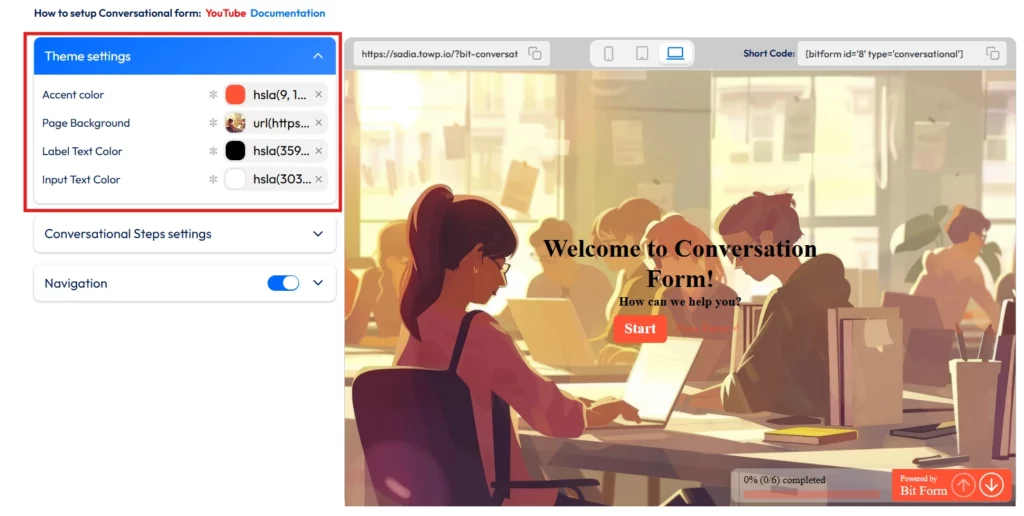
Here, you can keep solid, gradient, or add an image to the whole page. You just have to upload the image and make a few adjustments.
Or you can change the step background on every step. Just like I did.

Then comes Conversational Step Settings
In this section, as the name suggests, you can customize each step of the form as you want.
You can start by selecting the step you want to work on, then choose your preferred layout, change each step’s background, and set a layout image to give it a dynamic look.
Wait, that’s not it. There’s more to serve; you can modify button text, button background, and more parameters. In a nutshell, Bit Form’s customization option is endless. With Bit Form, there’s no creative boundary.
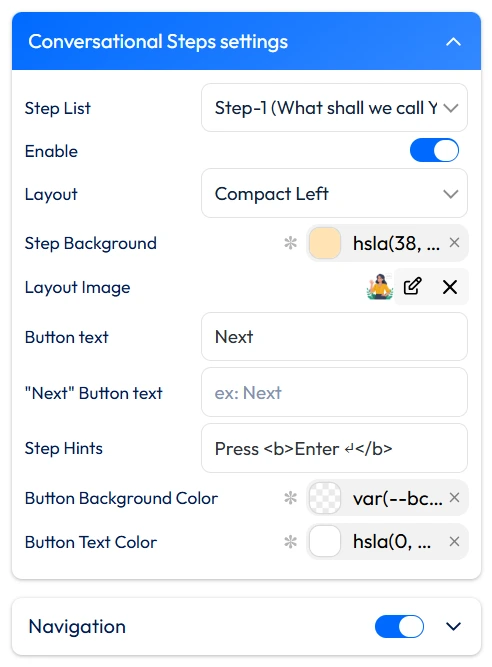
Look, you can customize elements of every step like this, or even better. It’s totally up to you.

Similarly, select the step number from the Step list dropdown and customize the other five steps.
With that done, let’s move on to the Navigation section.
Lastly, explore the Navigation settings
Bit Form’s Navigation settings are mainly used to help users track their progress over time, like how many steps are remaining, etc. This transparency makes the form more beginner-friendly. Fun part? You can adjust each element of this section, starting from Show Progress Label to Show Branding. There is no restriction.

To learn more about the Conversational form settings, you may follow this doc.
And finally, it’s done, your Project Inquiry Conversational Form creation is complete. Now it looks like a conversational form with chat UI.
Step 4: Now, add the form to your WordPress Website
Adding the form to your website is too easy. See, there are two ways: you can add it to the existing page, also you can create a new one.
After creating the page> open it >copy the Shortcode of the conversation form > and paste it in the “Shortcode Block”.
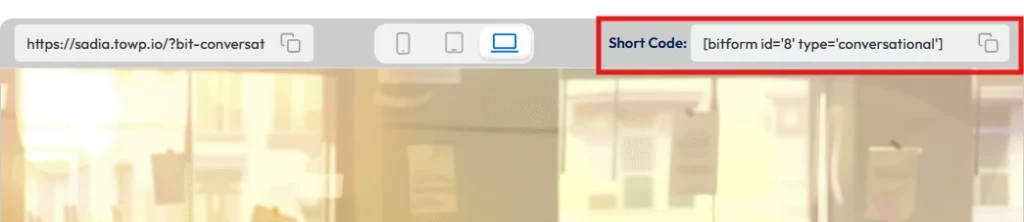
That’s it! Your conversational form is now live on your WordPress website!
Take a look at how it works in real time:
Ready to Boost Engagement with Conversation Forms!
To put it together, Conversation forms are game-changers. Replacing not-so-exciting traditional forms with friendly, conversational forms will not only improve user engagement but also get loyal customers and increase form completions greatly.
In this guide, I’ve tried to walk you through the simplest way to create a conversational WordPress form using the most affordable form builder, Bit Form.
Now, this is your take to turn those visits into real conversations!

Related Blog

How to Prevent Spam Form Submissions in WordPress

Create a WordPress File Upload Form for Free: Beginner’s Guide
